Thursday, October 10, 2013

October Tutorial for My Creative Scrapbook. Die cut Embellishing


Welcome to My October Tutorial for My Creative Scrapbook.
This month I thought I would have a play with Die cut Embellishments and border strips.  

This month there is a pack of Noteworthy Die cuts from Bo Bunny, and a packet of Canvas borders from Prima in your Main Kit.  They were fun to create with.  Die cuts dont have to be flat and boring!!!

 I began by pulling out the Cardstock die cuts from Bo Bunny and the canvas resist strips....


I sorted through them all and took a look at what I could layer together and add to.  So here are some of the things I did up front.

Distressing edges and adding inks is the first thing I did.  It adds dimension and texture to an other wise flat item.  Really easy to do and adds a lot with not much effort.


I used the distress tool from Prima by Ingvild Bolme

The next thing to do that instantly adds texture is sewing.
I love adding stitching to any little elements, as it makes them so much more dimensional. 


.....add ink and your tiny little boring embellishment has a totally new look!


 I also look for symmetrical elements I can cut in half and layer behind other things, to make them appear larger....great as photo mats in my Project Life!


The next thing I looked for were little areas I could make interactive.
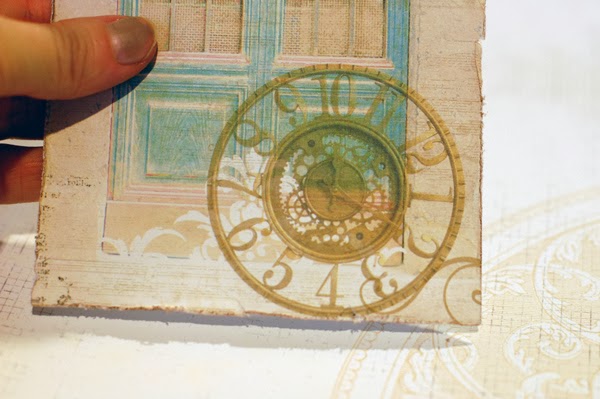
This pack has these little window/door/shutter elements which are perfect to 'open up'.


I popped my journalling under this little open window for my LO this month


I saw a few that I could accent with Glossy Accents, to pick out and highlight a pattern.
This is easy, and really effective!


The other thing I often do, is look at the border strips.  I dont use them as borders, but rather cut them apart and use them as smaller accents.  These little pieces were perfect for that.  Here is one cut apart.

 You can see them featured in my pages in the images to the left,  The little mustard coloured accents, was once a border strip, as was the little white canvas tag!!

And a step further,  I drew on top of the pattern with an embossing pen and then brushed on Perfect Pearls.
This is a lovely, yet easy technique with great results.


The tiny little circles in the pack make cute little flower centres, after I pulled apart the Prima roses, to make them less bulky for my Layouts.  Ink and add a foam dot for dimension.


Which brings me to the next step.  
The next thing is to see what accents can be layered to create more dramatic elements. 
 Foam tape and ink is a must here, to highlight the layering. 
 I have all these lovely little bits and pieces to create with.  Some can be slipped directly onto pages, sneaking them in around flower arrangements, and added to existing embellishing, creating cute little 'groupings' on your project, but some are perfect to layer together creating an entire layered accent to add directly as one piece to a project.


And here are some of the Canvas Border strips getting some they are cut apart, with an eyelet added with string and recoloured with spray ink/paint.


and here they are 'snuck' in around my projects......


This is a great way to make use of co-ordinating die cuts in Kits, and really get your moneys worth out of your Kit.  You can create many Layouts and cards with the one kit, using everything in the pack.  You just keep going until you have run out!  And you feel good about using your stash, ready for next months kit!!!!
Have a fantastic October!


Saturday, October 5, 2013

My Creative Scrapbook BLOG HOP.....

Welcome 
to the 


Pam and the Design Team are thrilled to celebrate the reveal of the beautiful October kits with an inspiration-filled Blog Hop complete with PRIZES!

If you are hopping along with us, you should have arrived here from Liz's blog.  If you just happened to stop by here to check in on me, please head over to the 
My CreativeScrapbook blog and start the BLOG HOP from there so that you don't miss out on any of the inspiration, prizes, and fun!

Be sure to leave comments as you hop along to each blog... your name could be drawn for one of the prizes!

This month, I worked with the MAIN KIT kit.  Here is a picture of the kit:


Here is what I created with this kit:

Lay Out 1
"He's waving Hello"


Lay Out 2- 
"i-pad Love"


Lay Out 3- 
"One Fine Day"


and my Project life Spread for Week 35
Side A


 and Side B.....


We are so excited about our kits and hope that you are, too.  For more information about any of the kits, or to reserve your kit, please visit 
http://www.mycreativescrapbook.com/kits.htm

Before you go,

remember to leave a comment and follow my blog 
to be eligible for the prize drawings!

Your next stop on the blog hop is


Thanks for Hopping today, hope you have enjoyed it so far!


And heres the entire link list just in case you missed someone.....


Shimmerz Paints October Challenge.

Its October and we have a new Challenge over on the Shimmerz Face Book Page!  SPC007.


So a good one to maybe get ahead on your card stash, or maybe Christmas cards?

Heres mine seeing it was my Daughters Birthday today.


So all you have to do is create a card, Post it on Facebook and title it SPC007.  Then there is a perk, should you choose to take advantage of it....Place an order on the Shimmerz WEBSITE and mention in the 'notes to merchant' section, that you participated in the 007 challenge and Stacey will add a free paint to your order.
NOT ONLY THAT, but if you win the challenge, you recieve a Paint pack AND a Guest Designer Position for the following month!  Pretty cool, and Super easy!

So get out your Shimmerz and Get card making!!!


Wednesday, September 18, 2013

My Creative Scrapbook- September Main Kit- LO5

Here is my final project for My Creative Scrapbook with the September Main Kit.  This kit has been great, and I still have left overs to create more.  I just ran out of time!

This one is a bit of a distressed grungy one.


I had fun creating this one, but it didnt turn out to be a favourite.  But what can you do?  The fun was in the creating.

So that is the September Main kit from My Creative Scrapbook in action.  Head over to the blog to see many more works of art from the very talented Designers.  PLUS there are oodles of fun tutorials posted all month, so have a look.

I have a tutorial that will be posted sometime this month on carving your own stamps to match a particular paper collection too.  Heres a sneak of that......

Heres the paper image.....


and heres the stamp....


fun to do!

Ok with that, I am off!  Thanks for checking in today.


Monday, September 16, 2013

My Creative Scrapbook September Main Kit- Project Life

I have the fourth project to share today, and its one of my favourite things to do!  PROJECT LIFE.  I dont get nearly as much time to do it, and I strive to catch up on it, but I am just a bit behind.....I will succeed sometime I guess!!!  LOL

I thought I would include a little of my process in this post as well.
I used the September Main Kit for My Creative Scrapbook.


Heres the spread all together.  Using lots of MME and WRMK from the Chalkboard collections.


I dont tend to use the Pre produced Project Life Brand cards, as I have so much stuff in my stash that is perfect to use up on PL Spreads.  I really enjoy the process of creating my own cards as well.
So here is how I started.


All the cards are usually either 6x4, 3x4 (half a 6x4) or 4x4.  

I choose the page pockets that are 6x4 and 3x4.  
Easy cuts to create these sizes.

When you are cutting up a 12x12 sheet of patterned paper, 
 just cut in half- (6x12)

turn, then make 2 cuts at 4 inches... (2  6x4)
now just cut those pieces in half according to the number of 3x4's you need.

Lay them all out according to the Page Pockets you are using for your spread.


Using my Corner Chomper, I cut the corners with the 1/4 inch side to round them, making them all uniform.  They look really nice with the rounded corners.


 Now piece your cards together as you go, I glue down when I am sure, and then just keep adding until I am happy with them.  If you keep them all in their place, you can get a good look at how they will all mesh together.

I then add all my stitching, pen lines and accents and text, to finish it all off!


And thats week 31 done and dusted!!!

Thanks for dropping in today!